We all are very well aware that QuickBooks is considered the ideal accounting software by small and mid-sized businesses. It is because the software has the capacity to cater to the business’s financial needs with perfection. The software helps to generate invoices, track sales, calculate tax, and numerous other amazing features. Including these features, the software also offers a document named credit memo. Here, in this blog, we will discuss what is a credit memo in QuickBooks and then proceed with the steps to create it.
What is a Credit Memo in QuickBooks?
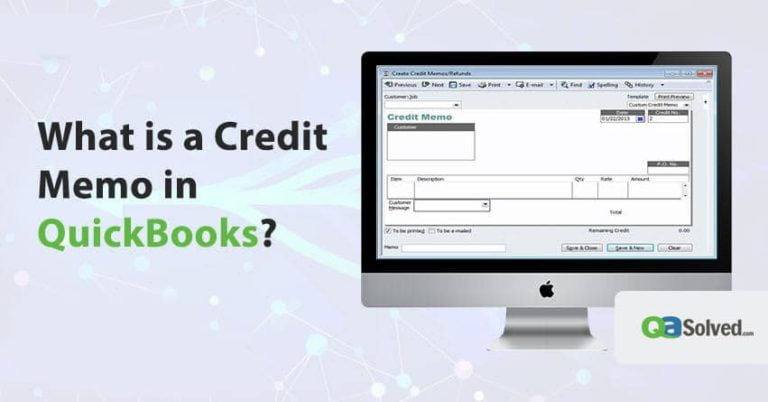
In QuickBooks, you can use credit memos which can give a transparent view on the credit given to a customer. A credit memo is a document in the QuickBooks software that helps to track payment reductions and customer payments. QuickBooks credit memo is used for items that were purchased by a customer and are being returned. It is used to track customer payments and any payment reductions due to unforeseen circumstances or reasons.
How to Create a Credit Memo in QuickBooks?
These steps will help you to know the amount which a customer owes as well as you owns the amount:
- First of all, on the QuickBooks homepage, you need to click on refunds and credits.
- Thereafter, you have to click on the customer option.
- You need to fill the credit memo form correctly.
- Now, you have to choose the correct channels via which the credit memo needs to be distributed.
- It is important to verify the amount on the credit memo and then click on save and then close.
- You will get a notification on your system in case there is a balance in the customer’s account.
- Finally, you have to check the open balance report or you can also check the customer’s transaction history to verify whether the credit memo has been added appropriately.
Steps to Create a Credit Memo for things that were Returned
You have to follow the below-given steps:
- You need to click on the refunds or create credit memo.
- Thereafter, click on the customer.
- Add the returned items and click on save and after adding click on close.
- You have to go to the credit window and then select the apt option from these:
- Retain as an available credit
- Give a refund.
- Apply to an invoice.
- Lastly, you need to click on ok.
Steps to Issue a Refund Check
These instructions you have to follow when the customers demand their money back:
- Firstly, you need to click on write checks which are under the banking menu.
- Secondly, you need to add the necessary information.
- You have to link the check and the overpayment.
- Click on save and close.
- You need to click on the received payments and then click on overpayment transaction.
- Thereafter, you are required to choose to refund the amount to the customer.
- You have to click on save and then close.
- Finally, you need to input the necessary information and then click on ok.
Now, let’s explore the procedure of creating it in QuickBooks Online.
How to Create a Credit Memo in QuickBooks Online?
The steps to create a credit memo in QuickBooks online are different from QuickBooks. Follow these instructions to keep a credit score of the customer:
Step 1- Create a Credit Memo
- First, you have to press + New.
- Now, you need to select a credit memo or give credit options.
- Adding the customer’s name is required and with this fill out the necessary fields.
- Date
- Product/service items
- Quantity
- Amount
- Finally, you need to click on save and then close.
Step 2- Apply the Credit Memo to an Invoice
- Initially, you need to press + New.
- Secondly, choose to receive payment or receive invoice payment.
- Thirdly, add the customer’s name and you will be filling the required fields:
Note: Check that you choose the same customer or project that you have selected in the invoice.
- Date
- Memo (it is optional)
- Now, you have to leave the fields payment method, reference no, deposit to, and the amount received blank.
- You need to click on the credit memo option from the step 1 in the credits section. After that, add the credit amount that your customer has to use.
- Check that the total to pay amount is correct.
- Lastly, you need to click save and then close.
Also Read: How to Process Credit Card Payments in QuickBooks Online?
Instructions to Automatically Apply Credit Memo to Invoices
These steps will help QuickBooks use credit memo as payments for open or newly created invoices:
- First, you need to go to settings and then click on account and settings.
- You have to click on the advanced tab. With this, click on the edit.
- Next, click on the automatically apply credits.
- Finally, you have to click on save and then done.
Create and Apply a Delayed Credit
Step 1: Creating a delayed credit
- First of all, choose + New.
- You are required to click on the delayed credit. On the other hand, in case you are in a business view, you need to follow the steps to switch to the accountant view first.
- Thirdly, you will be adding the customer’s name and fill out these fields:
- Date
- Products/service items
- Quantity
- Amount
- Finally, you need to click on save and then close.
Step 2: Apply the delayed credit
Following these steps will affect the specific period’s balances:
- First, you need to choose + New.
- Now, you have to click on the Invoice or send invoice.
- Next, you are supposed to select the customer for which you want to apply the credit to. With this, fill out the fields.
Note: In case your available credits are not visible, you need to click on the small arrow which is beside invoice balance.
- You have to click on add for adding a delayed credit to the invoice.
- Lastly, you need to click on save and then close.
Last, but not the least, make yourself aware of creating a credit memo in QuickBooks Desktop.
How to Create Credit Memo in QuickBooks Desktop?
These instructions will help you in creating a refund check or credit memo. You can keep a track record of the customer finance data:
Step 1: Create a Credit Memo
- To begin with, you need to click on the create credit memo/ refunds.
- You have to click on the customer option.
- You need to add the items to give credit for. The next step is to click on save and then close.
Step 2: Select the Process to Handle the Credit
You need to click on one of these options and then click ok.
- Retain as an available credit. The accounting software will add a negative amount in the accounts receivable register. This credit can be used as payment for the other transactions. In case you have selected to retain as available credit, you will see the existing credits in the customer payment window.
- Give a refund. The software user can issue a refund in cash, a check, or a credit card.
- Apply to an invoice. The accounting software will open the apply credit to the invoices window. With this, you need to click an invoice.
Option 1: Retain as an Available Credit
- First, you need to click customers and then receive payments.
- Now, you have to click your customer. With this, click on the discounts and credits
- Next, you have to check the credit that you want to apply and then press done.
- You will see a message on your system saying to confirm the transfer. You have to click on Yes.
- Lastly, click on save and then close.
Option 2: Give a Refund
- The check will be filled out automatically. After this, you have to click ok.
- You need to link the check to your overpayment.
- Click on the receive payments.
- You have to click on the customer option. Thereafter, click on the discounts and credits icon.
- You need to select the check which you have created and then press done.
- You may get a message on the PC to confirm the transfer. Click Yes. This manner, the amount will be applied automatically to the invoice.
- Finally, click on save & close.
Option 3: Apply a Credit to an Invoice
- At the time of creating a credit memo, you need to confirm that you have selected a customer: Job.
- Now, you need to click on the credit and then done.
Hopefully, with the help of the blog you have understood the step by step procedure of credit memo QuickBooks.
In a Nutshell
Expectedly, after reading the blog you have understood what is a credit memo in QuickBooks. For your ease, the steps to create a memo in QuickBooks, QuickBooks Online, and QuickBooks Desktop are given in the blog. The steps will help you in knowing the customer and buyer’s financial status of every day. If you are unaware of the process to create a memo in the software, you can take the help of this blog.
To get more insight details of what is a credit memo in QuickBooks, dial QuickBooks Support Number. (Toll-Free).
FAQ’s
A: Yes, you can use the memo text box for adding a memo description to the credit memo.
A: Follow these steps to unapply a credit in QB:
1. First, you need to search and open the credit memo.
2. Now, by pressing ctrl + h you will see the history associated with the credit memo.
3. You have to double-click the invoice on which credit had been applied.
4. You need to click the apply credits buttons.
5. Finally, you are required to clear the current credit selection.
A: These steps will help you to delete credit memos in the accounting software:
1. Firstly, you have to log in to the QuickBooks dashboard.
2. Secondly, you need to click on the company file.
3. Thirdly, you have to click on the customer’s tab.
4. Now, choose the customer’s center tab.
5. Finally, click on the jobs option.
A: These instructions will help you to delete the same:
1. First, you need to click on the customer and then click the name of the customer.
2. Now, you will be clicking the transactions tab and double-click on the credit memo.
3. Lastly, click delete and verify deleting the memo by clicking ok.
A: When you will start issuing a credit memo to a customer, you will be having three choices to return back the money which is being paid. So, in order to create a credit memo, you need to click on refunds & credits. You have an option to open the customer’s menu and then click on create credit memos/refunds. Last but not the least, you need to click on the correct customer job.
A: Here are the steps to write off a credit memo in QB:
1. You need to add the amount in the discount field.
2. Now, you have to choose the minor A/R and A/P charge-off options.
3. Lastly, click on the done option.
A: In case an invoice rises or goes low, a company has to issue a credit memo or debit to correct it. Memos are used by a bank to make adjustments to business checking accounts. The company can use the memo to track the adjustment in the account books.
A: Debit memo in QB will increase the amount which a customer owes. It is said to be a separate document from the invoice. Whereas, a credit memo will reduce account balances and invoices.
A: It is a note from a financial institution that is sent to a client. The note clearly states the customer’s incremental change in the account balances. It is generally a piece of good news.
A: Follow these instructions to print a credit memo:
1. First, you have to click the file menu option and then click the print forms option.
2. Now, you will be clicking the credit memo option, and then click the ok button.
3. Finally, you have to click the printer name and then choose the printer.